This
week we will be concluding our series of breakfast foods for the
dollhouse. Don't worry we will cover more breakfast items in the
future I just want to move on for a while and do some other things. I
think I have given you plenty of choices for now as far as breakfast
items go.
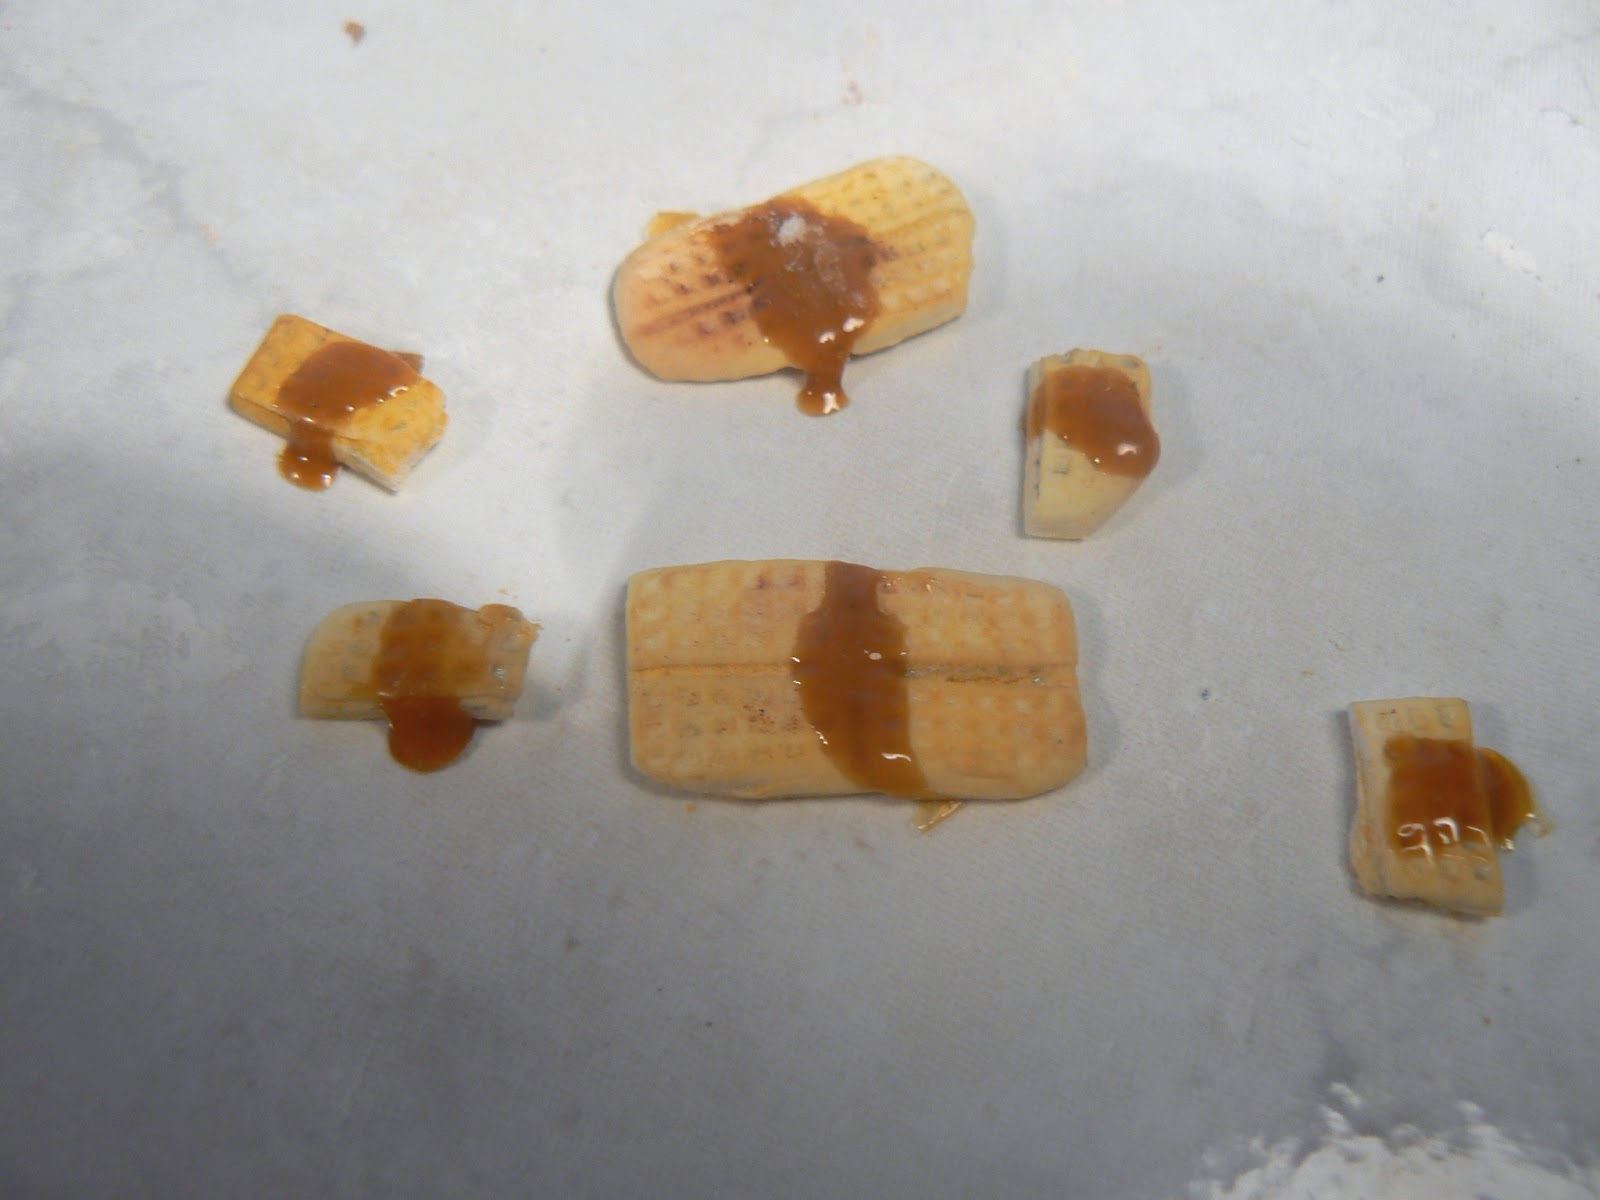
We
are once again using the mixture of equal parts translucent clay and
white clay that mixed up a while back. I told you I use this mixture
in a lot of foods. I am taking the easy way out as far as forming the
waffles in that I am using the metal mini waffle maker that I
purchased. I really recommend going this route for these. It takes a
lot of the guess work out of the process and saves you a lot of work.
If you don't want to buy one of these or can't get one then you can
spend some time to carve out the first waffle bake it off and then
use it to make a mold using the some Amazing Mold Putty (or a similar
product) Also check for items around the house and everywhere else
that look like either a waffle or the grid of a waffle maker. I know
I have seen buttons in the past with that type of design on them.
As
with most bread type products we will give the waffles a baked look
with layers of artist chalks. Start with a light golden yellow and
work up to some light touches of brown for accent. Remember you can
always add more color but it is next to impossible to remove it once
it is there.
If
you want to add some butter to your waffles I recommend using a
combination of pale yellow clay and some TLS for that. I didn't
choose to do that on mine but there is no reason you have to skip it.
For
my syrup I used some Amber Gallery Glass this time. It is a simple
way to replicate the syrup and I always have it on hand.