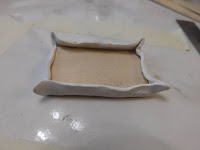
This week for the Saturday food related video we are making a large serving tray. Since every kitchen needs one I figured the dolls would love to have one too. This one is plenty big enough to hold the turkey we made a while back on the channel. I have some more ideas for things that can be served on it that I am planning to do in future tutorials also.
I like to use a clay that is equal parts translucent clay and colored clay. For the pieces I am making currently I am using white for the color then using chalk to color the outside of the items. I love this effect and I am really enjoying getting to use the pretty chalks that I usually don't get to use in food projects. You could also use a colored clay to begin with or use paint to color your project.
I used two craft sticks to help make sure my clay was rolled out to a consistent thickness. Then cut the clay oversize and start to form around the bottom and sides of the wood form. Do some smoothing to begin to get the shape then stick this in the freezer for about 15 minutes to get the clay cooled down to make it easier to work with. Take it out and immediately work on shaping it further, trimming excess clay away as needed. If it becomes too soft to work with stick it back in the freezer to firm it up and continue to work with it until you are happy.
Next
color the bottom and sides with chalk in the color of you choice. I
am loving this blue I am using lately. So pretty and it is going to
look really nice in the dollhouse kitchen.
Now bake at 275°F for 10 minutes. Allow to cool to room temperature before proceeding.
Now if you chose to paint instead of using chalks do that now.
Once you are finished it is time to give the tray a really thin coat of gloss Mod Podge. It is much better to use two thin coats than a thick coat of gloss Mod Podge on polymer clay. I find thicker coats tend to stay sticky while I don't usually have that problem with very thin coats.
Once dry your tray is ready to display.
As always I do want to sincerely thank all of you for watching my videos and reading my blog posts. It means so much to me that you are supporting me in this way. If I could ask you all to do just a bit more by subscribing to the channel and liking the videos and leaving comments. Those help more than you can imagine. Also if you could pass the links on to your friends I would appreciate it so much.


No comments:
Post a Comment